Basic overview
You may have as many projects as you want. To create a project, from your projects homepage, choose with EMPTY or EXAMPLE. If you choose EMPTY, you will have a blank template to work from. If you choose EXAMPLE, you will be given a fully fledged example.
The example template is actually copied into your user space - you may freely alter this as much as you like - it is yours - you cannot destroy it for others.
If the text on the screen looks like handwriting, you can change it. Click the text to enter edit mode, or from a mobile device just press it.
For any image you see, you can drag a picture onto it from your computer - but this must be done from the screen you create the item on. For example, if you are adding an actor to the project, you can change the actors image on the ACTORS page. But you cannot change the actors image on say, the SCENE page.
If you are on a mobile device (or desktop), click the image and an editor will appear. From here you can upload an image (take a photo, or simply draw on the screen) for the element in question. Just remember to press save before you close the screen.
The main menu bar

Projects
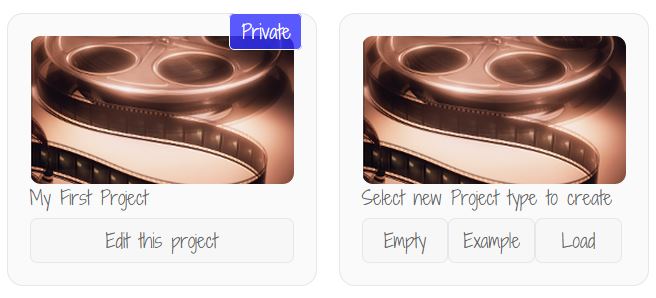
The Project view is the top image on this page, and allows you to select the project you want to work on or to create new projects. The projects will be ordered alphabetically.
Overview
The overview is for a specific project. From this tab, you can export the xml, delete the project and add general information about it. You may also share the project with another user by clicking the share button and typing in their username. The project image is by default the first image in the projct scenes, but you can upload a new one by either dragging onto the picture or by clicking it and uploading/drawing.
Actors
The actors tab allows you to specify all the actors for the project. These may be specifc people, or a group of people for example (i.e. Large hostile crowd).
Assets
Assets are items which you will need to remember to bring along to the scene in question. There is a report later which tells you which scenes need which assets, and which assets are in which scenes.
Shot Types
Shot types allows you to determine the type of filming for the scene in general.
Locations
Where are you filming - add it here! Reports exist detailing the scenes/actors and assets in each location.
Clothing
What should the actor be wearing in the scene. Define it once here so that you always get continuity, even if you are filming on different days on different scenes.
Scenes
The main working panel - see the dedicated panel below.
Reports
A screen with many helper reports. I am always open to sugggestions for new ones, if you need one, ping me an email!
Sizing Selectors
A tool which changes the view of the page, see below.
The Scenes Tab
The main focus of your work will probably be the scenes tab. On here you plan your actual screenplay. You can add actors, locations, clothing, assets, dialgue and image sequences as you please.
A screenplay is made up to two components - a number of scenes and a number of sets.
Sets
A set is simply a placeholder, think of it like a folder. It can contain more scenes or sets to as many levels as you like. You could for example have one titled 'Opening Credits' and put all the scenes for it inside of the set.
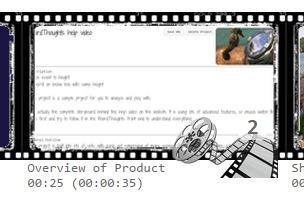
The time length of a scene cannot be set, and is calculated automatically by its contents. The time on the left is the total length of the set, the time in brackets being the time the set ENDs on your storyboard. You can name and set descriptions for sets. Sets have the 'film reel' on the bottom left of the image. Above the reel is a number, 2 in this case - this indicates the numbers of sib elements within the set. Remember - if you see the film reel logo, it is a SET not a SCENE.

If you hover over the set, the above 5 icons appear. From left to right, they are show contents, delete, move, settings, and play.
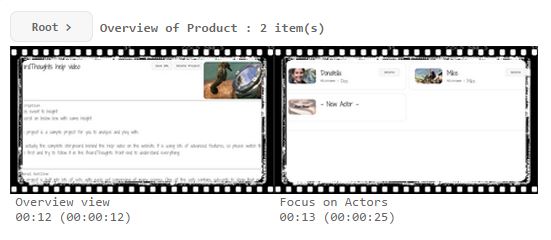
If you click the show contents button, the contents of the set will be shown. In the above picture you can see that a ROOT button has appeared above the film strip. Click this to go up to the main timeline. If you were a few sets deep, each set name would appear next to ROOT enabling you to navigate up and down.
Scenes
Scenes are where everything happens.
I will be detailing the desktop version here, but the large icon version is the same bar extra tabs to help reduced screen size.
On the left of the window is where you set the time for the scene and also static objects, such as actors, assets, the location and so on. You can also assign clothes to actors at this stage. Notes and general descriptions for the scene are also able to be added.
The right hand portion allows you to build up image sequences and dialogue/actions.
Image Sequences
By default, the first image of the image sequence is the image used to depict the scene. As with all images, drag your image file onto the image to change, or click the image to draw/upload.

In the above example, we have a starting image setting the scene (starting at 0 seconds). We did not need to, but we added a second image to show the zoomed in image at 6 seconds.
Dialgue and movements
The dialogue box allows you to add actor movement and dialogues as required. Each item has an actor, a start time (in 1/10ths of seconds) and and end time.
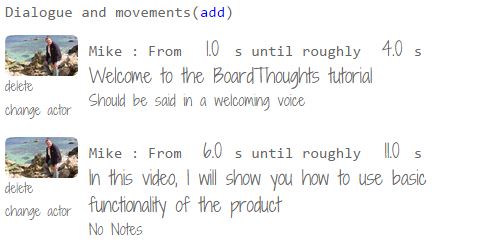
You can set dialogue by adding text to the top box, and notes/actions by adding it to the lower text box. If the actor is not in the scene, they are added automatically. Items can overlap as much as you want, and are sorted by the from time.
Play button
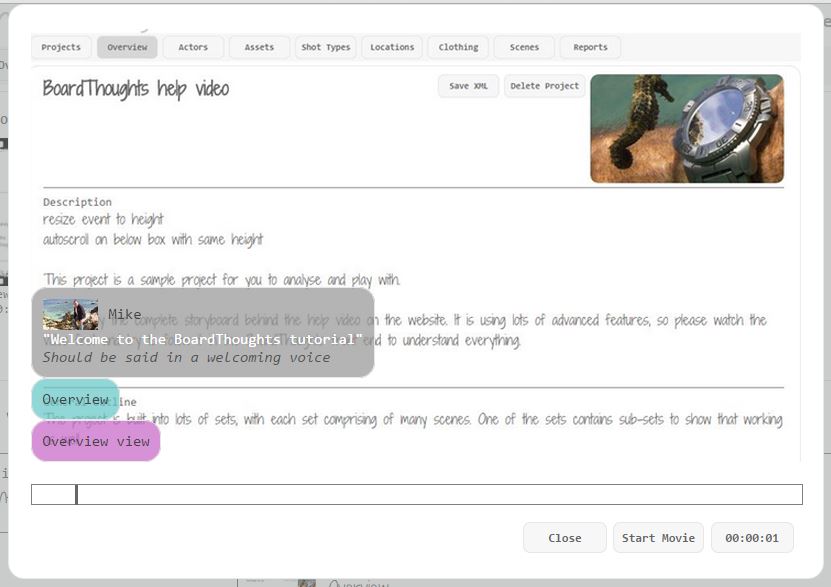
You can choose to play a single scene, a set or the entire project by clicking on the relevant button.
When you click it, a pop up appears and will show each scene/image in sequence for the correct time duration. The scene name and image name is also shown for 2 seconds on change over. The actors speech and instructions are also shown in the play window.
You can pause the movie at any time you want.


")
